Table of Contents
- Introduction
- Phase 1: Idea & Research
- Phase 2: Discovery & Planning
- Phase 3: Design (UX & UI)
- Phase 4: Development (Front-end & Back-end)
- Phase 5: Content & SEO
- Phase 6: Testing & Quality Assurance
- Phase 7: Launch & Deployment
- Phase 8: Post-Launch Monitoring & Maintenance
- Cost, Timeline & Team Roles
- Tools & Tech Stack
- Case Study: Example Project
- Checklist: Pre-launch & Post-launch
- FAQs
- Conclusion & CTA
Introduction
Imagine this: You’ve got a brilliant business idea, but your current website is a relic from the dial-up era—slow, clunky, and converting visitors into customers at a snail’s pace. Or worse, you don’t have one at all, and potential leads are slipping away to sleeker competitors. Sound familiar? You’re not alone. In today’s digital-first world, a poorly built site can tank your revenue faster than a bad review on Trustpilot.
That’s where a structured website development process comes in. From the spark of an idea to the triumphant launch, this guide walks you through every step of building a website that not only looks great but performs like a well-oiled machine. We’ll cover the website development process in detail, breaking it down into manageable phases so you can avoid common pitfalls and hit the ground running.
Whether you’re a startup founder sketching your MVP website process on a napkin or a seasoned marketer overhauling an e-commerce platform, this step-by-step website development process will equip you with actionable insights. By the end, you’ll have a clear roadmap, complete with timelines, costs, and even a handy checklist to ensure your launch is smooth sailing. Let’s dive in and turn that idea into a live, revenue-generating reality.
Phase 1: Idea & Research
The foundation of any successful website starts with a solid idea, but rushing in without research is like building a house on sand. This initial phase is all about validating your vision and setting the stage for everything that follows in the website build process.
Define Goals & KPIs
Begin by asking: What do you want this website to achieve? Is it driving sales, generating leads, or simply raising brand awareness? Be specific. For a local bakery, goals might include boosting online orders by 30% within six months. Tie these to measurable key performance indicators (KPIs) like conversion rates, bounce rates, or monthly unique visitors.
Without clear goals, your project risks scope creep—adding features willy-nilly that dilute focus. Jot down three to five SMART goals (Specific, Measurable, Achievable, Relevant, Time-bound) to keep everyone aligned.
Audience & Persona Research
Who is your website for? Dive deep into your target audience. Create detailed buyer personas: fictional profiles based on real data. Think demographics (age, location), psychographics (interests, pain points), and behaviours (online habits).
For example, if you’re launching a fitness app’s companion site, your persona might be “Active Andy,” a 35-year-old office worker juggling gym sessions with family life. Tools like surveys or social media polls can uncover what content resonates—does Andy crave quick workout tips or in-depth nutrition guides?
Competitor & Gap Analysis
Next, spy on the competition. List five direct rivals and analyse their sites: What’s working? Strong calls-to-action? Seamless navigation? Use free tools to check their load times and mobile responsiveness.
Identify gaps—opportunities where you can shine. If competitors’ sites bury their pricing page in a maze of menus, make yours front and centre with a transparent pricing table. This analysis isn’t about copying; it’s about differentiating.
Market Validation
Don’t assume—validate. Run quick surveys via Google Forms or test a simple landing page with tools like Unbounce. Track metrics like email sign-ups or click-through rates to gauge interest.
Picture a tech startup testing a SaaS tool: A one-week landing page campaign nets 200 sign-ups, confirming demand. This phase typically takes 1-2 weeks and prevents costly pivots later.
By the end of Phase 1, you’ll have a validated concept that’s laser-focused on your audience’s needs, setting a strong tone for the rest of the web development workflow.
Phase 2: Discovery & Planning
With your idea vetted, it’s time to map out the blueprint. This discovery phase is where dreams meet reality, turning vague notions into a concrete plan. Skipping it often leads to delays and budget overruns, so invest the time here.
Requirements Gathering (Functional & Non-Functional)
Start with a deep dive into needs. Functional requirements cover what the site must do: user logins, e-commerce carts, or blog publishing. Non-functional ones handle how it performs: speed under 3 seconds, scalability for 10,000 users monthly.
Host stakeholder interviews or workshops. For a non-profit’s donation site, functional might include one-click giving; non-functional could specify 99.9% uptime. Document everything in a shared spec sheet to avoid “I thought you meant…” moments.
Sitemap & Information Architecture
Visualise your site’s structure with a sitemap—a hierarchical diagram of pages and content. This is the skeleton of your information architecture (IA), ensuring users find what they need intuitively.
Tools like Lucidchart make this easy. For an e-learning platform, your sitemap might branch from Home to Courses > Beginner > Enrol, with clear labels and no more than three clicks to key actions. A logical IA boosts SEO and user satisfaction.
Feature Prioritisation (MVP vs Future Scope)
Not everything makes the cut for launch. Use MoSCoW prioritisation (Must-have, Should-have, Could-have, Won’t-have) to build a minimum viable product (MVP). Focus on core features that deliver value fast.
Say you’re developing a recipe app site: Must-haves include search and save functions; could-haves like AI meal planning go on the roadmap. This MVP website process keeps timelines tight while leaving room to iterate.
Project Plan, Milestones, and Deliverables
Wrap up with a Gantt chart or Trello board outlining milestones: Week 4 for wireframes, Week 12 for beta testing. Define deliverables per phase, like approved designs or code repositories.
Assign owners and buffers for surprises. A well-planned project might span 8-16 weeks for a mid-sized site, ensuring steady progress without burnout.
This phase, often 2-4 weeks, transforms chaos into clarity, paving the way for creative design work.
Phase 3: Design (UX & UI)
Design isn’t just about pretty pixels—it’s crafting an experience that delights and converts. In this phase of the website development steps, we blend user-centric UX with visually stunning UI to create sites people love to use.
Wireframes & User Flows
Kick off with low-fidelity wireframes: simple sketches of page layouts, minus colours or images. These outline structure, like placing a hero banner above a services grid.
Map user flows too—journeys from landing page to purchase. For a travel booking site, one flow might be: Home > Search Flights > Select > Pay. Tools like Balsamiq speed this up, revealing bottlenecks early, such as a confusing checkout.
High-Fidelity Mockups & Style Guide
Elevate to high-fidelity mockups in tools like Figma, adding typography, colours, and icons. Consistency is key, so develop a style guide: brand colours (e.g., primary blue #007BFF), fonts (sans-serif for readability), and spacing rules.
Imagine a fashion retailer’s mockups: Vibrant product galleries with hover effects that scream elegance. Review iterations with stakeholders to refine before coding begins.
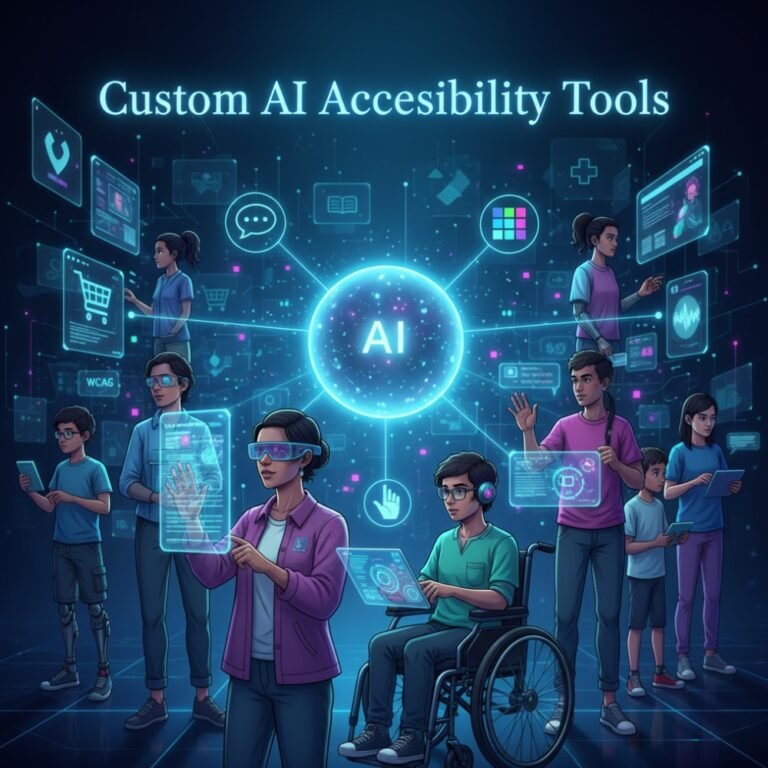
Accessibility & Responsive Design
Design for everyone. Follow WCAG guidelines for accessibility: alt text for images, keyboard navigation, and sufficient colour contrast. Test with screen readers to ensure inclusivity.
Responsive design adapts to devices—mobile-first is non-negotiable. A media query in CSS might shrink navigation to a hamburger menu on phones. This future-proofs your site against the 60%+ mobile traffic.
Prototyping & Usability Testing
Bring mockups to life with interactive prototypes. Click through flows to spot friction.
Then, usability test: Recruit 5-10 users for sessions via UserTesting. Watch them navigate—do they hesitate on forms? Feedback loops here catch 85% of issues, saving dev time later.
Design phase runs 3-6 weeks, yielding assets that guide development while prioritising user joy.
Phase 4: Development (Front-end & Back-end)
Now the magic happens: Code brings designs to life. This hands-on phase splits into front-end (what users see) and back-end (the engine room), forming the core of your how to build a website journey.
Front-end Choices (HTML/CSS/JS Frameworks)
Front-end is the facade: HTML for structure, CSS for styling, JavaScript for interactivity. Opt for frameworks like React for dynamic sites or Tailwind CSS for rapid, utility-first builds.
For a portfolio site, vanilla JS might suffice for smooth scrolls; e-commerce demands Vue.js for cart updates without page reloads. Ensure semantic HTML for SEO—think <header> over <div>.
Back-end Choices (CMS vs Custom, Databases, APIs)
Back-end handles logic: Servers, databases, authentication. Choose a CMS like WordPress for quick blogs or custom Node.js/Express for tailored apps.
Databases? MySQL for structured data, MongoDB for flexible. Integrate APIs for third-party magic, like Stripe for payments. A custom back-end shines for scalability but ramps up complexity.
Integrations (Payment, CRM, Analytics)
Seamlessly connect tools: Embed Google Analytics for tracking, HubSpot CRM for leads, or PayPal for transactions. Use Zapier for no-code links if needed.
Example: An online course platform integrates Teachable API for enrolments, ensuring data flows without silos.
Dev Workflows: Version Control, Staging, CI/CD
Streamline with Git for version control—branch for features, merge via pull requests. Staging environments mimic production for safe testing.
CI/CD pipelines (e.g., GitHub Actions) automate builds and deploys, slashing errors. This collaborative workflow keeps devs humming, typically over 4-8 weeks.
Development turns static designs into a functional powerhouse, ready for polish.
Phase 5: Content & SEO
Content is king, but in the website launch checklist, it’s the mortar holding bricks together. This phase optimises for search engines and users, weaving SEO into every page.
Content Strategy & Page Templates
Craft a strategy: What topics drive traffic? Map keywords to pages—blog posts for long-tail queries like “best vegan recipes 2025.”
Use templates for consistency: Hero section, body copy, CTAs. For a B2B consultancy, templates ensure case studies follow a problem-solution-results format, engaging readers.
SEO Basics: Keywords, Meta Tags, Schema
Sprinkle primary keywords naturally, like “website development process” in headings. Craft meta titles/descriptions with hooks, and add schema markup for rich snippets—JSON-LD for FAQs boosts click-throughs.
Target LSI terms: web development workflow, site build steps. Tools like Ahrefs inspire, but focus on user intent.
Image Optimisation & Lazy Loading
Compress images to under 100KB with TinyPNG; use WebP format for crispness without bloat. Implement lazy loading via HTML attributes—images load only when scrolled to, slashing initial load times.
Internal Linking & Structure
Link internally to guide users and crawlers: From blog to services page with anchors like “Explore our website design services.” A silo structure—group related content—enhances topical authority.
This 2-4 week phase ensures your site ranks and converts from day one. For more on SEO, check Google’s Search Central.
Phase 6: Testing & Quality Assurance
No launch without rigorous testing—it’s the safety net catching bugs before they bite users. This phase verifies everything works as intended, upholding trust and performance.
Functional Testing (Forms, User Journeys)
Test core functions: Does the contact form submit? Track full journeys—registration to dashboard. Manual scripts or Selenium automate repeats.
Spot edge cases: What if a user enters invalid email? Fix promptly to prevent drop-offs.
Cross-browser & Device Testing
Check compatibility across Chrome, Safari, Firefox, and Edge. Use BrowserStack for virtual devices, ensuring layouts hold on iOS and Android.
Mobile quirks? Pinch-to-zoom on galleries should feel native, not glitchy.
Performance Testing (Lighthouse, GTmetrix)
Run audits with Google’s Lighthouse: Aim for 90+ scores in accessibility and SEO. GTmetrix flags slow assets.
Optimise: Minify JS, enable GZIP. A pre-test site at 5s load might hit 2s post-tweaks, boosting conversions by 7%.
Security Checks (SSL, OWASP Basics)
Secure with HTTPS via Let’s Encrypt SSL. Scan for vulnerabilities using OWASP ZAP—block SQL injections, XSS.
Accessibility Testing (WCAG Checklist)
Validate against WCAG 2.1: WAVE tool flags issues like missing ARIA labels. Remediate for AA compliance, opening doors to wider audiences.
QA spans 2-3 weeks, delivering a bulletproof product. Learn more at W3C’s WCAG guidelines.
Phase 7: Launch & Deployment
The big day: Going live. Excitement mixes with nerves, but a methodical approach ensures a flawless rollout in this pivotal website development step.
Pre-launch Checklist (Backup, DNS, Redirects)
Double-check: Full backups via UpdraftPlus, DNS propagated (use What’s My DNS?), 301 redirects for old URLs.
Verify SSL certs and staging-to-prod sync. One missed redirect? Traffic lost forever.
Deployment Steps (Staging → Production)
Push code via FTP or Git deploy. For cloud hosts like AWS, use blue-green deployments—switch traffic seamlessly.
Monitor in real-time: UptimeRobot pings every minute post-go-live.
Post-launch Smoke Tests
Quick sanity checks: Load pages, submit forms, test payments. If a hero image 404s, rollback immediately.
Rollback Plan
Have a safety valve: Versioned backups for quick restores. Define triggers—like 5% traffic drop—for swift retreats.
Launch takes 1-2 days, but prep is key. Celebrate, then monitor.
Phase 8: Post-Launch Monitoring & Maintenance
Launch isn’t the end—it’s the start of ongoing care. This phase keeps your site thriving, adapting to user feedback and algorithm shifts.
Analytics & Conversion Tracking
Install Google Analytics 4 for insights: Track events like add-to-cart. Set up goals for sign-ups.
Review weekly: High bounce on a page? A/B test headlines.
Regular Backups & Updates
Automate daily backups to Google Drive. Patch CMS/plugins monthly—WordPress security updates prevent hacks.
Performance Optimisation Schedule
Quarterly audits: Core Web Vitals via PageSpeed Insights. Cache with WP Rocket, CDN via Cloudflare.
Feature Roadmap & A/B Testing
Plan v2: User surveys fuel ideas. Test variants with Optimizely—does button colour A or B lift clicks?
Ongoing maintenance (monthly 4-8 hours) ensures longevity. For analytics setup, visit Google Analytics.
Cost, Timeline & Team Roles
Budget and schedule realities ground the website development timeline and cost. Let’s break it down realistically.
Typical Timeline for Simple / Medium / Complex Projects
Timelines vary by scope:
- Simple (one-pager/landing): 2-4 weeks. Ideal for lead gen.
- Medium (5-20 pages, basic e-comm): 6-12 weeks. Includes custom forms.
- Complex (web app, integrations): 3-6 months. Heavy custom dev.
Factors like revisions add 20% buffer. Agile sprints keep momentum.
Cost Estimate Brackets with What’s Included
Costs reflect complexity (UK averages, 2025):
| Project Type | Estimated Cost | What’s Included |
|---|---|---|
| Simple | £2,000-£5,000 | Wireframes, basic build, 1 round revisions, launch support. |
| Medium | £5,000-£15,000 | Full design, CMS setup, integrations, testing, 6 months maintenance. |
| Complex | £15,000+ | Custom back-end, advanced SEO, ongoing roadmap, team of 5+. |
Freelancers cut costs; agencies add polish. Hidden fees? Scope changes—lock in contracts.
Who Does What (PM, Designer, Dev, QA, SEO)
A lean team covers bases:
- Project Manager: Oversees timelines, budgets; your single point of contact.
- Designer (UX/UI): Crafts visuals, prototypes; ensures brand alignment.
- Developer (Front/Back-end): Codes functionality; troubleshoots.
- QA Tester: Hunts bugs; validates across devices.
- SEO Specialist: Optimises content, tracks rankings.
For solos, overlap roles. Scale with freelancers via Upwork.
Understanding these equips you to plan wisely, avoiding surprises.
Tools & Tech Stack
The right tools accelerate your web development workflow. Here’s a curated stack for efficiency.
Design Tools (Figma, Adobe XD)
Figma leads for collaborative prototyping—real-time edits, no installs. Adobe XD suits Adobe ecosystem users, with auto-animate transitions.
Both export clean assets for devs, streamlining handoffs.
Dev Tools (VSCode, Git, Node, Docker)
VSCode: Free, extensible IDE with Git integration. Node.js powers back-end; Docker containerises for consistent environments.
GitHub for repos—pull requests foster clean code.
Hosting & Deployment (Managed Hosts, CDNs)
Netlify or Vercel for JAMstack deploys—git-push to live. WordPress? SiteGround for managed hosting.
Cloudflare CDN caches globally, cutting latency.
Analytics & Monitoring (Google Analytics, Sentry)
GA4 tracks behaviour; Sentry logs errors in real-time. Hotjar heatmaps reveal user friction.
This stack, costing £0-£100/month, empowers pros and beginners alike.
Case Study: Example Project
Let’s see the website development process in action through a hypothetical yet realistic case: EcoWear, a sustainable clothing startup launching their e-commerce site.
The Challenge: Founders had a vision for an eco-friendly brand but no site—relying on Instagram for sales, capping growth at £10k/month. Competitors like Patagonia dominated with seamless shopping experiences. Goals: Triple revenue in year one, target millennials valuing transparency.
The Solution: We followed the full website build process. Phase 1 validated via surveys (80% interest in carbon footprint trackers). Planning locked an MVP: Shop, blog, about pages.
Design featured earthy tones, mobile-first wireframes. Development used Shopify for back-end (quick integrations), React front-end for dynamic filters. Content included SEO-optimised product descriptions with schema for rich results.
Testing caught a mobile cart glitch; launch went live on a Tuesday morning with email blasts.
Results: Post-launch, load time dropped from 4s (old static page) to 1.8s. Organic traffic surged 250% in three months via targeted keywords like “sustainable fashion UK.” Conversions hit 4.2%, pushing monthly revenue to £28k. Timeline: 10 weeks; cost: £8,500.
Metrics before/after:
| Metric | Before | After |
|---|---|---|
| Bounce Rate | 72% | 41% |
| Avg. Session | 1:12 | 3:45 |
| Monthly Sales | £10k | £28k |
EcoWear’s story shows how a structured approach delivers ROI. Ready for yours? Check our portfolio for more.
Checklist: Pre-launch & Post-launch
Streamline your launch with these actionable checklists. Copy-paste or download as a PDF for your team.
Pre-launch Checklist
- Complete site backup (local + cloud).
- Verify all forms and links function.
- Test payments/integrations end-to-end.
- Optimise images and enable caching.
- Set up 301 redirects for old URLs.
- Confirm DNS points to new host.
- Run full performance audit (Lighthouse score >90).
- Accessibility scan (no critical errors).
- SEO: Submit sitemap to Google Search Console.
- Team walkthrough: Assign monitoring roles.
Post-launch Checklist
- Smoke test: Load 10 key pages on multiple devices.
- Monitor uptime (tools alerting for >1min downtime).
- Check analytics tracking fires correctly.
- Scan for broken links (Screaming Frog).
- Gather initial user feedback (Hotjar surveys).
- Schedule first backup post-launch.
- Review error logs (Sentry/console).
- A/B test one element (e.g., CTA button).
- Update social bios/links to new site.
- Plan 30-day review: Traffic, conversions.
These ensure nothing slips through the cracks.
FAQs
How long does the website development process take?
The website development process timeline depends on complexity: a basic site might wrap in 2-4 weeks, while a feature-rich e-commerce platform could take 3-6 months. Factor in revisions and testing for a realistic buffer—agile methods help keep things on track.
What are the stages of website development?
The key stages include idea validation and research, planning and discovery, UX/UI design, front- and back-end development, content integration with SEO, thorough testing, launch deployment, and ongoing maintenance. Each builds on the last for a cohesive web development workflow.
How much does a typical website cost?
Costs for building a website range from £2,000 for simple landing pages to £15,000+ for custom apps, covering design, dev, and launch. In the UK, expect mid-range sites around £5,000-£10,000, including basic SEO and hosting setup—always get quotes tailored to scope.
Should I choose a CMS or a custom build?
A CMS like WordPress suits quick, content-heavy sites with easy updates, ideal for blogs or small businesses. Go custom for unique features like advanced user dashboards—it’s scalable but pricier. Weigh maintenance needs against flexibility in your MVP website process.
What should I prepare before starting a website project?
Before diving into website development steps, define goals and KPIs, research your audience, and analyse competitors. Gather brand assets (logos, tones) and a rough sitemap. A clear brief prevents misalignments and speeds up the discovery phase.
How do you ensure my website loads fast and ranks well?
Fast loading starts with optimised images, minified code, and CDNs, targeting under 3-second loads via tools like GTmetrix. For rankings, integrate on-page SEO from the outset: keyword-rich content, mobile responsiveness, and schema markup. Regular audits keep performance sharp.
Can I update the website myself after launch?
Absolutely, especially with a CMS—add blog posts or tweak text via intuitive dashboards. For design changes, plugins like Elementor empower non-coders. Custom sites might need dev help for core tweaks, but we always include training for self-sufficiency.
Conclusion & CTA
A well-executed website development process isn’t just a project—it’s a launchpad for growth, turning visitors into loyal customers and ideas into income. By following these phases, from initial research to post-launch tweaks, you sidestep headaches and maximise impact.
Ready to build? Let’s craft a site that stands out—contact us today. Your success story starts now.